A Comprehensive Guide to Planting and Growing Bush Beans

Are you looking to add a nutritious and delicious crop to your vegetable garden? Look no further than bush beans! These compact plants are easy to grow, require minimal maintenance, and produce an abundant harvest of tender, flavorful beans. In this comprehensive guide, we’ll walk you through everything you need to know to successfully plant and grow bush beans in your garden.
Why Grow Bush Beans?
Bush beans are an excellent choice for home gardeners for many reasons. They’re packed with nutrients, including protein, fiber, vitamins, and minerals, making them a healthy addition to any diet. They have a short growing season, allowing for multiple plantings throughout the summer, which means you can enjoy fresh beans for months. Unlike pole beans, bush beans don’t require trellising or support, making them perfect for small gardens or containers. Plus, they come in a variety of colors and flavors, from classic green to yellow, purple, and even striped varieties, so you can add visual interest to your garden and your plate.
Choosing the Right Location

When selecting a spot to plant your bush beans, there are a few key factors to consider. First and foremost, bush beans require at least 6-8 hours of direct sunlight per day to thrive, so choose a location that receives plenty of sun. Next, consider the soil quality. Beans grow best in well-draining, fertile soil with a pH between 6.0 and 6.8. If you’re not sure about your soil’s pH, you can purchase a simple soil test kit at your local garden center. Finally, keep in mind the principles of crop rotation. Avoid planting beans in the same location where other legumes (such as peas or soybeans) were grown in the previous year, as this can lead to disease and nutrient depletion.
Preparing the Soil
Before you plant your bush beans, it’s important to properly prepare the soil. Start by removing any weeds, rocks, or debris from the planting area. Then, use a garden fork or tiller to loosen the soil to a depth of 8-10 inches. This will help ensure that the beans’ roots have plenty of room to grow and access the nutrients they need.
To improve soil fertility and structure, incorporate a 2-3 inch layer of compost or well-rotted manure into the soil. This will provide a slow-release source of nutrients for your beans throughout the growing season. If your soil is heavy clay or sandy, you may also want to consider adding organic matter such as peat moss or coconut coir to improve texture and water retention.
Planting Bush Beans
Once your soil is prepared, it’s time to plant your bush beans. The best time to plant beans outdoors is after the last frost date in your area, when soil temperatures have reached at least 60°F (15°C). This is typically in late spring or early summer, depending on your climate.
To plant your beans, sow the seeds directly into the garden, planting them 1 inch deep and 2-3 inches apart in rows spaced 18-24 inches apart. If you’re planting in containers, choose pots that are at least 12 inches deep and wide, and fill them with a high-quality potting mix. After planting, water the seeds gently and keep the soil consistently moist (but not soggy) until germination occurs, which typically takes 7-14 days.
Caring for Bush Beans
To ensure a healthy and productive crop of bush beans, there are a few key care tips to keep in mind. First and foremost, water your beans deeply and regularly, providing 1-1.5 inches of water per week, especially during flowering and pod development. To conserve moisture and suppress weeds, mulch around the base of the plants with a 2-3 inch layer of organic material such as straw or shredded leaves.
When watering your beans, it’s best to avoid overhead watering, which can promote fungal diseases. Instead, use drip irrigation or a soaker hose to deliver water directly to the roots. This will help keep the foliage dry and minimize the risk of disease.
In terms of fertilization, beans are relatively light feeders and can actually fix nitrogen in the soil, so they don’t require a lot of additional fertilizer. If you do choose to fertilize your beans, opt for a low-nitrogen fertilizer (such as a 5-10-10 blend) and apply it sparingly, no more than once per month.
Finally, be sure to monitor your bean plants regularly for signs of pests or diseases. Common pests include aphids, bean beetles, and spider mites, while common diseases include powdery mildew and bean mosaic virus. If you notice any issues, take appropriate control measures as soon as possible to prevent the problem from spreading.
Harvesting Bush Beans
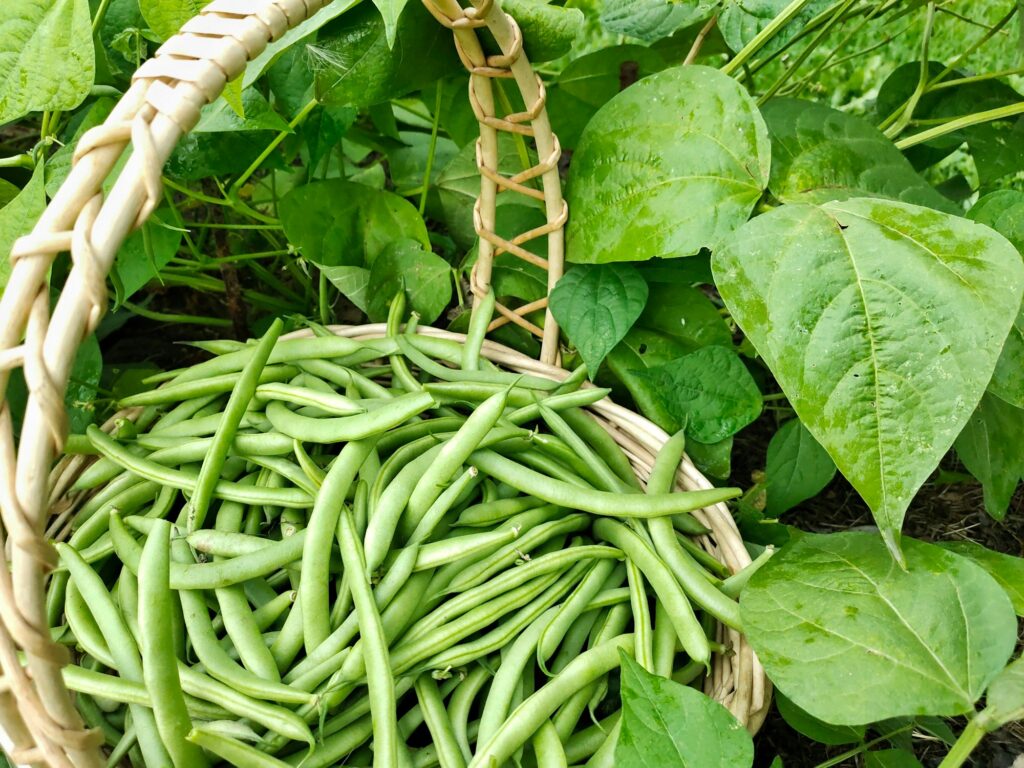
One of the best things about growing bush beans is the abundant harvest they provide. You can begin harvesting your beans when the pods are young and tender, typically 50-60 days after planting. To encourage continuous production, be sure to pick your beans regularly (every 2-3 days). The more you pick, the more the plants will produce!
When harvesting your beans, use both hands to avoid damaging the plant. Grasp the pod with one hand and the stem with the other, then gently twist and pull to remove the pod. It’s best to harvest in the morning when the pods are dry to minimize the spread of disease. You can store your harvested beans in the refrigerator for up to a week, or freeze them for longer-term storage.
Companion Planting with Bush Beans
Did you know that bush beans can be great companions for other plants in your garden? Companion planting is the practice of growing certain plants together to enhance growth, repel pests, or improve flavor. Some great companion plants for bush beans include:
- Corn: Beans and corn are a classic companion planting combination. The beans fix nitrogen in the soil, which benefits the corn, while the corn provides support for the beans to climb.
- Marigolds: Planting marigolds around your bean plants can help repel pests such as bean beetles and nematodes.
- Potatoes: Beans and potatoes grow well together because they have different nutrient needs and can help suppress weeds when planted in alternating rows.
- Radishes: Planting radishes around your bean plants can help loosen the soil and improve drainage, which is important for preventing root rot.
On the other hand, there are a few plants that should not be planted near bush beans, including:
- Onions and garlic: These plants can stunt the growth of beans and other legumes.
- Beets: Beets and beans compete for similar nutrients in the soil, so it’s best to plant them in separate areas of the garden.
- Fennel: Fennel can inhibit the growth of beans and other plants, so it’s best to keep it far away from your bean patch.
Conclusion
As you can see, planting and growing bush beans is a rewarding and relatively easy endeavor for home gardeners. By choosing the right location, preparing the soil properly, planting at the right time, and providing proper care and maintenance, you can enjoy a bountiful harvest of delicious, nutritious beans all summer long. So what are you waiting for? Get out there and start planting those beans!


